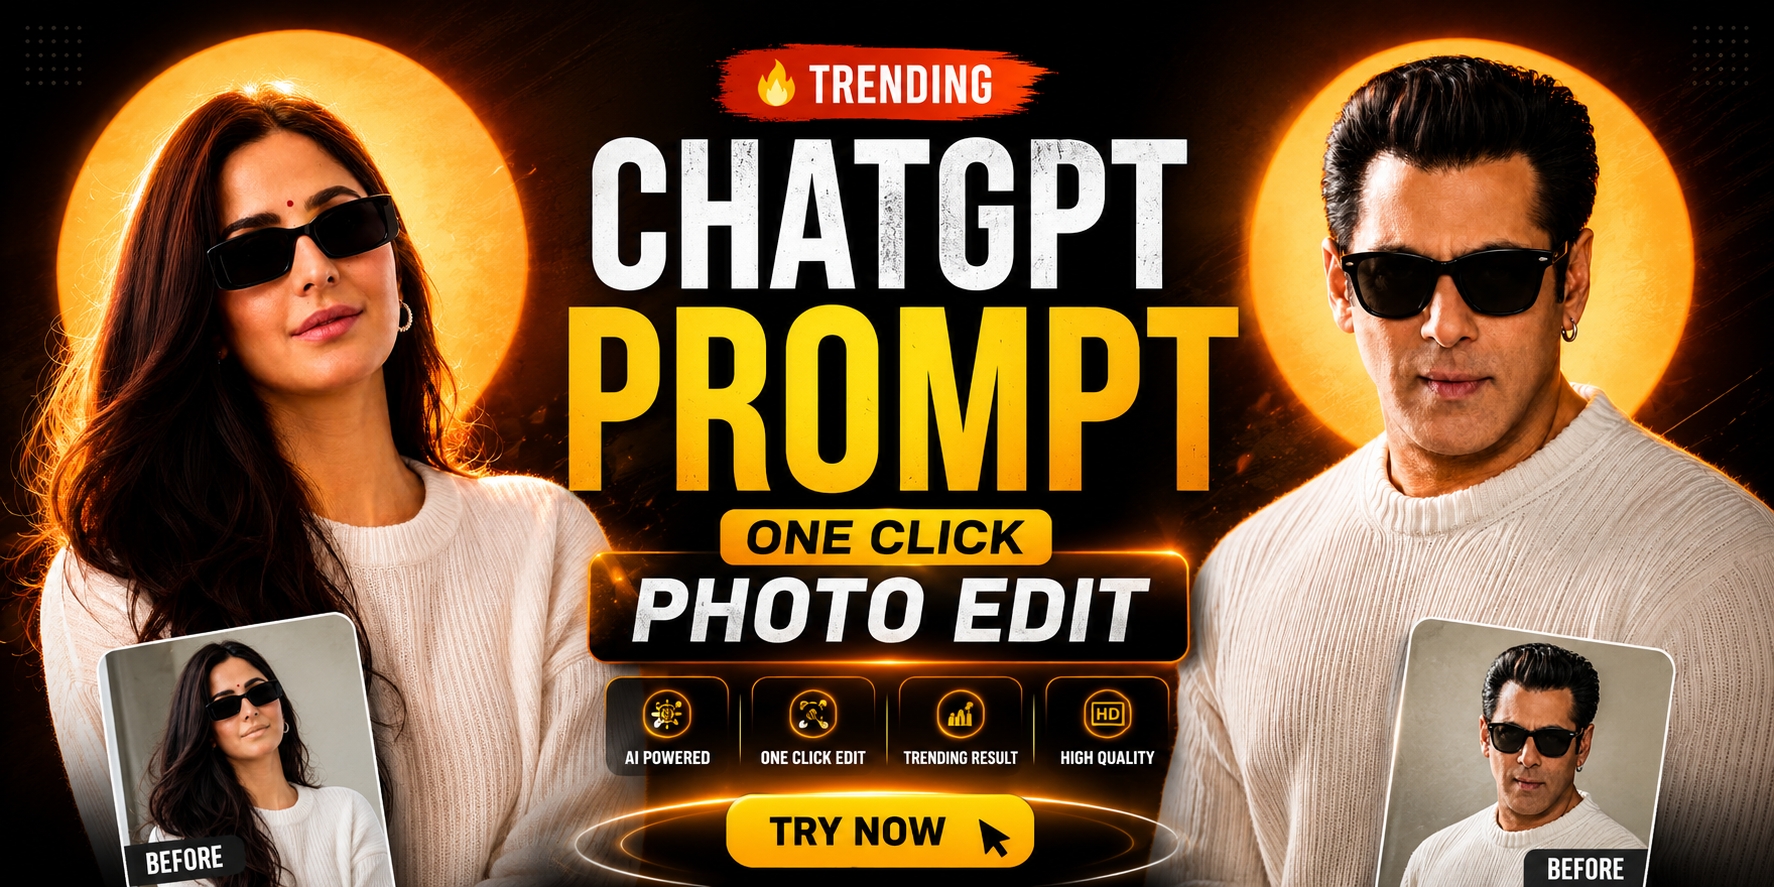
Aaj ke is fast-forward digital zamane mein, photo editing aur content creation ka tarika puri tarah se badal chuka hai. Saal 2026 mein ek trend internet par aag laga raha hai, aur wo hai Ultra Realistic Cinematic AI Photo Editing Prompt | ChatGPT Viral Trend 2026. Ek waqt tha jab aisi high-quality, magazine-cover jaisi photos click karne ke liye mehnge DSLR cameras, professional studio setup aur advanced Photoshop skills ki zaroorat padti thi. Lekin ab, sirf ek perfect AI command ka use karke aap apni normal selfie ko ek luxury editorial portrait mein convert kar sakte hain.
Agar aap Instagram, Facebook, ya kisi bhi social media platform par apni profile ko ek premium aur celebrity jaisa look dena chahte hain, toh ye article aapke liye game-changer hone wala hai. Aaj main aapko wo secret viral ChatGPT prompts dene wala hoon jo is waqt sabse zyada trend kar rahe hain. Sath hi, hum detail mein samjhenge ki in prompts ko step-by-step kaise use karna hai aur apni marzi ke mutabiq customise kaise karna hai.
AI Photo Editing Trend 2026: Itna Viral Kyun Hai?
Pichle kuch saalon mein AI ne bohot tarakki ki hai, lekin 2026 mein audience ko normal filtered photos ya cartoonish AI avatars pasand nahi aate. Aaj ki demand hai cinematic lighting, sharp focus, aur deep aesthetics. Jab aap ChatGPT (DALL-E 3) ya Midjourney jaise AI tools ko ek highly detailed text prompt dete
hain, toh wo AI aapki imagination ko reality mein badal deta hai.
Is current trend ki sabse badi khasiyat hai iska “Identity Lock” feature. Pehle jab log AI mein apni photo dalte the, toh AI unka chehra puri tarah badal deta tha. Lekin in naye viral cinematic prompts ka kamaal ye hai ki ye aapka face, skin tone aur facial features bilkul change nahi karta. Ye sirf aapke aas-paas ka environment, aapke kapde aur lighting ko ek high-budget Hollywood studio jaisa bana deta hai. Isse photo 100% real aur authentic lagti hai.
2 Secret Viral Prompts For Ultra Realistic Cinematic Photos
Yahan main aapke sath do sabse powerful aur viral prompts share kar raha hoon (ek boys ke liye aur ek girls ke liye). In prompts mein jo specific words use hue hain, wo AI ko directly command dete hain ki photo ko cinematic, high-quality aur ultra-realistic kaise banana hai. In prompts ko carefully copy karein.
1. The Ultimate Cinematic Prompt For Men (Boys)
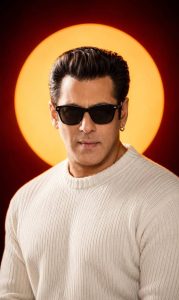
Agar aap ek strong, confident aur premium look chahte hain, toh is prompt ko copy karein. Kripya is prompt ko dhyan se dekhein:
Prompt Copy
Use the uploaded reference image as the exact identity of the man. STRICT IDENTITY LOCK: Preserve 100% facial structure, skin tone, hairstyle, beard, facial features, age, body proportions, and identity. Do not alter the face or natural appearance. Premium white ribbed knit sweater, sleek black rectangular sunglasses, small silver hoop earring, confident fashion pose with chin slightly lifted, looking directly at the camera. Luxury editorial studio portrait, deep burgundy background with a large glowing circular sun disc centered behind the head. Strong frontal beauty lighting, warm facial glow, subtle golden rim light around the hair and shoulders, high-contrast shadows, chest-up composition, 85mm lens, f/1.8, ultra-realistic 8K, premium magazine cover aesthetic.
2. The Ultimate Cinematic Prompt For Women (Girls)
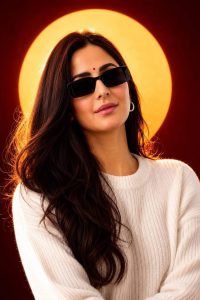
Girls ke liye ek elegant, glowing aur luxury fashion magazine cover jaisa look create karne ke liye, is prompt ka use karein:
Prompt Copy
Use the uploaded reference image as the exact identity of the woman. STRICT IDENTITY LOCK: Preserve 100% facial structure, skin tone, hairstyle, facial features, age, body proportions, and identity. Do not alter the face or natural appearance. Premium white ribbed knit sweater, sleek black rectangular sunglasses, small silver hoop earring, confident fashion pose with chin slightly lifted, looking directly at the camera. Luxury editorial studio portrait, deep burgundy background with a large glowing circular sun disc centered behind the head. Strong frontal beauty lighting, warm facial glow, subtle golden rim light, high-contrast shadows, chest-up composition, 85mm lens, f/1.8, ultra-realistic 8K, premium magazine cover aesthetic.
In AI Prompts Ko Sahi Tarike Se Use Karne Ka Step-by-Step Process
Bahot se beginners prompt copy kar lete hain, lekin unhe sahi result nahi milta kyunki unhe process nahi pata hota. Is Ultra Realistic Cinematic AI Photo Editing Prompt ko genuinely aur perfectly use karne ka step-by-step process yahan diya gaya hai:
Step 1: Sahi AI Tool Ka Selection Karein
Sabse pehle aapko ek powerful Image-to-Image AI generator open karna hai. Ye specific prompts ChatGPT Plus (jisme DALL-E 3 integrated hai) ya phir Midjourney v6 par sabse best kaam karte hain. In tools mein complex commands ko samajhne ki capacity hoti hai.
Step 2: Perfect Reference Image (Selfie) Click Karein
AI ko aapka face samajhne ke liye ek reference chahiye. Apni ek clear, front-facing selfie click karein. Pro Tip: Koshish karein ki photo natural lighting (jaise window ke paas) mein click ki gayi ho, aur aapka face properly visible ho. Side pose ya aadhi chhupi hui face wali photo use na karein.
Step 3: AI Tool Mein Image Upload Karein
Apne selected AI tool ke chatbox ya prompt bar mein jayein. Wahan image upload karne ka option (paperclip icon ya plus icon) hoga. Wahan apni wo clear selfie upload kar dein.
Step 4: Prompt Copy Aur Paste Karein
Image upload hone ke baad, jo prompt maine upar diya hai (apne gender ke according), use exactly copy karein. Fir chatbox mein image ke theek niche us prompt ko paste kar dein
Step 5: Generate Command Dein
Prompt paste karne ke baad ‘Enter’ ya ‘Generate’ button par click karein. Ab AI apna process start karega. AI STRICT IDENTITY LOCK” command ko padh kar aapka face save karega aur background, lighting, aur outfit ko command ke hisaab se render karega.
Step 6: Image Upscale Aur Save Karein
Jab AI aapko results de de, toh jo photo aapko sabse zyada pasand aaye us par click karein aur use high resolution mein download kar lein. Agar aap Midjourney use kar rahe hain, toh “U” (Upscale) button press karke image ki quality ko enhance kar sakte hain.
Apne Style Ke According Prompt Ko Customise Kaise Karein? (Intent Guide)
Hamesha ek hi prompt par depend rehna zaroori nahi hai. Ek accha creator wahi hai jo tools ko apni marzi se control kare. Aap apne mood aur intent ke hisaab se in prompts ko easily customise kar sakte hain. Aaiye is prompt ko break down karte hain aur customisation ka process samajhte hain:
1. Outfit Aur Accessories Change Karna
Upar diye gaye prompt mein likha hai: “Premium white ribbed knit sweater, sleek black rectangular sunglasses, small silver hoop earring”
- Customisation Process: Agar aapko ek dark, mafia ya cyberpunk look chahiye, toh aap is line ko replace kar
sakte hain. Example: Is line ko delete karein aur likhein “Black leather biker jacket, thick silver chain, no sunglasses.” Is ek line ke change se AI turant aapka outfit aur puri vibe change kar dega.
2. Background Aur Environment Badlna
Prompt mein background ke liye likha hai: “deep burgundy background with a large glowing circular sun disc centred behind the head”
Customisation Process: Agar aapko ye studio background nahi chahiye aur aap outdoor look chahte hain, toh is part ko modify karein. Example: Is text ko hata kar likhein “Neon lit Tokyo street background at midnight with blurred city lights, glowing cyberpunk aesthetic.” Isse aap studio se nikal kar sidha ek cinematic city mein pohoch jayenge.
3. Lighting and Camera Settings (The Secret Editor Sauce)
Prompt mein sabse valuable lines hain: “Strong frontal beauty lighting, subtle golden rim light, 85mm lens, f/1.8, ultra-realistic 8K”
Customisation Process: Editing ki duniya mein 85mm lens aur f/1.8 aperture ka matlab hota hai ki subject (aap) ekdum sharp dikhenge aur background beautifully blur (bokeh effect) ho jayega. Agar aapko ek wide shot chahiye jisme aapki puri body dikhe, toh “chest-up composition” ko hatakar “full body wide angle portrait” likhein aur lens ko “35mm lens” se replace kar dein.
Crucial Warning: Prompt ke shuruwati hisse, yani “STRICT IDENTITY LOCK: Preserve 100% facial structure, skin tone, hairstyle…” ko kabhi bhi delete ya change mat karna. Ye wo core foundation hai jo AI ko aapka asli chehra maintain rakhne ke liye majboor karti hai.
Jab AI aapki photo generate kar de, toh usme ek aakhiri jaan dalna baki hota hai. AI-generated photos kabhi-kabhi bahot zyada perfect lagti hain, jisse wo nakli lagne lagti hain. Ise real camera photo jaisa banane ke liye ye steps follow karein:
Add Film Grain: Adobe Lightroom Mobile app open karein. Apni AI photo import karein aur ‘Effects’ panel mein jayein. Wahan thoda sa grain (approx 15 to 20) add karein. Isse photo mein ek real vintage camera ka organic texture aayega aur AI ka artificial smoothness khatam ho jayega.
Texture Aur Clarity: Agar photo thodi soft ya plasticy lag rahi hai, toh Lightroom mein Texture ko +10 aur Clarity ko +5 par set karein. Isse aapke kapdon ke threads aur skin details aur zyada pop-out hokar dikhengi, jo cinematic realism ko badhata hai.
Conclusion
Toh dosto, ye tha Ultra Realistic Cinematic AI Photo Editing Prompt | ChatGPT Viral Trend 2026 ka pura secret aur step-by-step process. AI aaj ke time mein sirf ek tool nahi, balki ek digital magic wand ban chuka hai. Agar aapko prompt engineering ki sahi samajh ho aur apne prompts ko customise karna aata ho, toh aap apne mobile se hi world-class, premium level ka content create kar sakte hain.
Maine jo prompts aur unhe apply karne ka step-by-step tarika aapke sath share kiya hai, use aaj hi try karein. Reference image upload karein, perfectly prompt paste karein aur magic dekhein. Editing ek art hai, aur aap jitna zyada naye words aur settings ke sath experiment karenge, aapki profile utni hi premium banti jayegi. Practice karte rahein aur apni digital presence ko enhance karte rahein!