
How to Create Cinematic AI Videos in 2026 | Best AI Video Editing Tutorial
Aaj ke digital era mein simple video editing se aage badhkar AI-driven workflows ka daur aa chuka hai. Agar aap social media platforms par high-engagement visual content build karna chahte hain, toh aapko pata hona chahiye ki How to Create Cinematic AI Videos in 2026 koi complex science nahi hai. Bas sahi visual prompts, smart AI tools, aur precise colour grading techniques ka combination chahiye.
Is detailed Best AI Video Editing Tutorial mein hum bilkul shuruat se step-by-step seekhenge ki kaise aap ek simple text prompt se Hollywood-style, hyper-realistic, aur cinematic AI videos create kar sakte hain.
High-Quality Cinematic Image Generate Karna
Kisi bhi cinematic AI video ka foundation uski base image Quality par depend karta hai. Agar aapki photo mein lighting, shadows, depth of field, aur texture sahi nahi honge, toh AI video maker bhi accha motion output nahi de payega.
Image Prompt (Copy & Paste)
Sabse pehle aapko apne kisi bhi preferred AI Image Generator (jaise Leonardo AI, Midjourney, ya Flux) mein jaakar ek cinematic photorealistic image create karni hai. Below diya gaya exact prompt use karein:Photorealistic Image Prompt:
“A hyper-realistic cinematic shot of a futuristic cyberpunk detective standing under neon streetlights in a rainy alleyway, dramatic side lighting, shallow depth of field, 8k resolution, photorealistic textures, shot on 35mm lens, atmospheric fog, dark moody colour palette –ar 16:9 –v 6.0”
Image Generation Ka Step-by-Step Process
Step 1: Apne AI image generator tool par login karein.
Step 2: Landscape cinematic videos ke liye aspect ratio 16:9 choose karein (ya Reels/Shorts ke liye 9:16).
Step 3: Upar diye gaye prompt ko prompt box mein enter karein.
Step 4: Prompt mein “35mm lens”, “shallow depth of field”, aur “dramatic side lighting” jaise keywords ensure karte hain ki photo flat na lage.
Step 5: Generate button par click karein aur sabse high-resolution version ko apne device mein HD / 4K format mein download kar lein.
Image Ko Google Flow Se Cinematic Video Mein Convert Karna
Ab humari generated image tayar hai. Next step hai is static image ke andar natural, subtle, aur smooth motion add karna. Iske liye hum Google Flow AI (ya Runway Gen-2 / Vidu AI) tool ka istemal karenge.
Motion Prompt (Copy & Paste)
AI video generator tools mein text prompt ke zariye motion define karna hota hai. Camera movement natural aur slow hona chahiye taaki video chaotic na lage. Image-to-Video Motion Prompt:
“Slow cinematic pan camera movement, realistic rain falling effect, glowing neon reflection on wet pavement, subtle wind blowing through coat, ultra-smooth motion, 60fps feel, high visual coherence.”
Video Generation Ka Step-by-Step Process
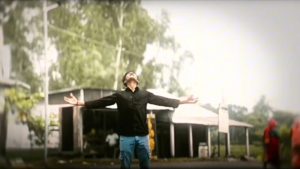
Use the uploaded reference image as the exact identity reference and recreate the same realistic cinematic sequence shown in the reference video. Create one single full-screen landscape video in 16:9 aspect ratio, approximately 12–13 seconds long. This prompt should work for any subject, regardless of age, gender or appearance. Preserve the exact identity, face, hairstyle, skin tone, body proportions, clothing, accessories and footwear from the reference image. Keep the same outfit consistently throughout the complete video. For the original look, use a dark maroon/brown long-sleeve shirt with loose white pants. Create one continuous realistic camera shot on a wet urban road just after rain. The road must have realistic water reflections, soft cloudy daylight, green trees, a road divider, distant buildings, passing scooters and a calm rainy atmosphere. The scene should look like real professional DSLR footage with natural colors, realistic depth of field, detailed wet asphalt and subtle motion blur. At the beginning, show a close rear view of the subject walking slowly away from the camera on the wet road. The subject’s arms remain relaxed and the walking speed stays natural. The camera follows smoothly from behind without shaking. Show the wet shirt fabric, natural body movement and realistic reflections on the road. Then gradually move to a medium rear shot while the subject continues walking in the same direction. Slowly reveal more of the road, trees and background. Keep the subject centered and maintain the same face, hairstyle, clothing and body shape. Do not suddenly change the camera angle or make the subject disappear. Next, smoothly pull the camera farther backward into a wide shot. Reveal the broad wet road, road divider, trees, buildings and passing traffic. The subject should remain clearly visible in the center of the frame. Add a few realistic gray-and-white pigeons flying naturally in the cloudy background, matching the reference video. The pigeons should remain small and distant, with subtle realistic motion blur, and must never cover the subject. After the wide road reveal, slowly shift to a natural three-quarter side angle while the subject keeps walking. The subject gently raises one hand toward the hair in a calm, natural movement. The hand must move slowly and realistically from the side of the body to the head. Keep the fingers, wrist and elbow anatomically correct. Do not make the hand jump, disappear or bend unnaturally. Continue with a side-profile walking shot. The subject keeps one hand resting naturally on the head for a short moment while scooters and vehicles pass in the background with realistic motion blur. The camera should track the subject smoothly at walking speed. Add a few pigeons flying behind the subject across the cloudy sky, just as they appear in the reference scene. Keep the pigeons realistic, small and naturally spaced. Then the subject slowly lowers the hand from the head and continues walking calmly. The camera moves slightly backward and returns to a side-rear angle. Keep the road reflections, traffic, trees, cloudy sky and rainy atmosphere consistent. Do not change the location, time of day, outfit or lighting. End with a wide rear shot as the subject continues walking away on the reflective wet road. The subject becomes slightly smaller in the frame while the road, trees, pigeons and cloudy background remain visible. Finish with a soft cinematic hold, natural motion and a gentle fade-out if supported. The final result must look like one real continuous video, not an AI animation. Use natural walking physics, realistic camera tracking, accurate human anatomy, natural hand movement, believable fabric movement, realistic vehicle motion, soft cloudy lighting, detailed wet-road reflections and cinematic color grading. Output must remain landscape 16:9 from beginning to end. Do not show the collage, panels, borders, split-screen or storyboard layout in the final video. Do not create a duplicate subject, extra main characters, cartoon pigeons, oversized birds, distorted hands, face morphing, outfit changes, sudden camera cuts, shaky camera, unnatural walking, teleportation, jumping, falling, running, dangerous road action, text, logo or watermark
Create AI Video Tools
Step 1: Google Flow ya apne AI Video Tool ko open karein aur “Image-to-Video” option select karein.
Step 2: Pehle step mein download ki gayi Cinematic Base Image ko upload drop-box mein daalein.
Step 3: Motion prompt text area mein upar diya gaya motion prompt type karein.
Step 4: Camera Controls mein Motion Intensity/Speed ko Low se Medium (2 to 4) ke beech rakhein aur Slow Pan Right ya Subtle Zoom In select karein.
Step 5: Generate par click karein aur AI ko visual rendering complete karne dein.
High-Quality Video Export Karna
AI video generate hone ke baad directly social media par post karna sahi decision nahi hota. Quality loss se bachne ke liye aapko sahi export settings follow karni padengi.
Video Export Ka Step-by-Step Process
Step 1: Video preview mein frame distortion ya weird AI warping ko dhyan se check kar lein.
Step 2: Agar tool mein AI Upscale to 4K ka option dikhe, toh uspar zaroor click karein.
Step 3: Export Resolution mein hamesha 1080p (FHD) ya 4K UHD set karein.
Step 4: Frame Rate hamesha 30 FPS ya 60 FPS hi select karein.
Step 5: Standard universal playback ke liye MP4 (H.264 / H.265 codec) format mein video export karke save kar lein.
CapCut / VN Editor Mein Cinematic Colour Grading
AI se mili hui raw clip abhi 80% ready hai. Final 20% professional punch lane ke liye humko CapCut, VN Editor, ya Alight Motion jaise popular apps mein Cinematic Colour Grading karni hoti hai.
Post-Production Editing Ka Step-by-Step Process
Step 1 (Clip Import): CapCut ya VN Editor open karke new project banayein aur exported AI video clip ko timeline par import karein.
Step 2 (Basic Lighting): Adjustments section mein jaakar Brightness ko -5% to -8%, Contrast ko +12% to +15%, Highlights ko -10%, aur Shadows ko +5% par set karein.
Step 3 (HSL Colour Grading): HSL Tool mein Orange/Yellow hue ki Saturation +15% badhayein, aur Blue/Cyan colours ki Hue ko Teal tone ki taraf shift karein. Unwanted background colours ki saturation -20% kam karein.
Step 4 (Cinematic Effects & Overlay): Clip par minimal Soft Glow filter (Opacity 10-15%) add karein, natural look ke liye 2% to 5% Film Grain daalein, aur canvas par top-bottom Cinematic Black Bars (2.35:1) apply karein.
Step 5 (Final Render): Video ko 1080p resolution, 30 FPS, aur high Bitrate par render aur export kar lein.
Bonus Editing Tip: Sound Design Se Video Mein Jaan Daalein
Pro Editor Secret: Cinematic AI Videos ko next-level banane ka asli raaz hai Foley & Ambient Sound Design. Sirf AI video aur background music se impact nahi banta. Timeline mein video ke motion ke hisaab se Rain ASMR Sound, Neon Light Hum SFX, Heavy Footsteps, aur Deep Bass Drops layer karein. Jab audio aur visual micro-sync hote hain, tab viewer ka retention 3x badh jata hai.
Conclusion
Naye AI tools ke aane se video creation process fast zaroor hua hai, lekin ek sachha cinematic look hamesha ek editor ke vision, storytelling, aur detail-oriented post-production par depend karta hai. Is detailed tutorial mein bataye gaye Image Prompts, Google Flow Motion Controls, aur CapCut Colour Grading ke steps ko step-by-step follow karein. Consistency ke saath practice karein, alag-alag lighting concepts try karein, aur apni video editing maste
ry ko Next Level par le jayein! Happy Editing!